by
by 
In this article, we are going to learn How to Turn off Automatic Updates in Windows 10. Windows 10 automatic update is frustrating for me, without my knowledge update going on and when I try to restart or shut down my computer it will take more time and some time is going updating mode so I am not able to work at that time. Automatic Windows 10 update takes up the system resources as well as the network which is not good for me.
How to Disable Windows 10 Automatic Updates
I don’t want to update my Windows 10 without my permission if I want to update that time it should be updated otherwise not. To disable the Windows 10 updates we have 3 ways:
- Change the Setting of the Group Policy Editor
- Disable Windows Update Service
- Metered Your Network Connection
Change the Setting of the Group Policy Editor
I am using Windows 10 Pro edition, and here you can make some changes in the Group Policy which helps you to disable the automatic update if you want to update you have manually go to settings, and then in the Update & Security section you have to manually check the update if you want.
Disabling the Automatic Update
If you want to permanently disable the Windows 10 update you have to follow the following steps:
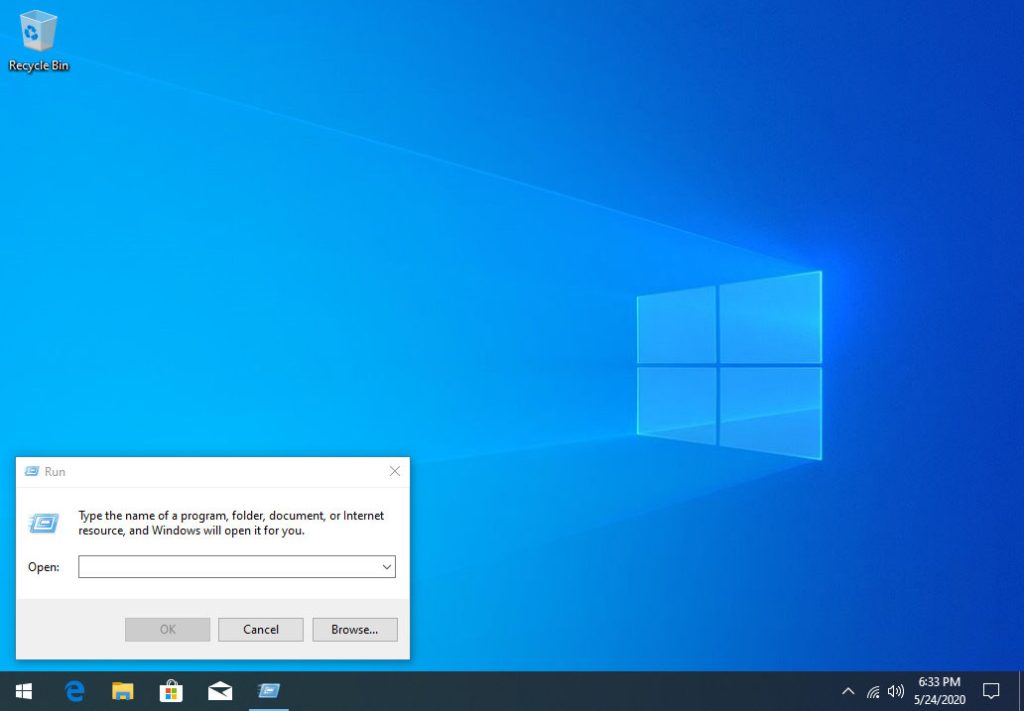
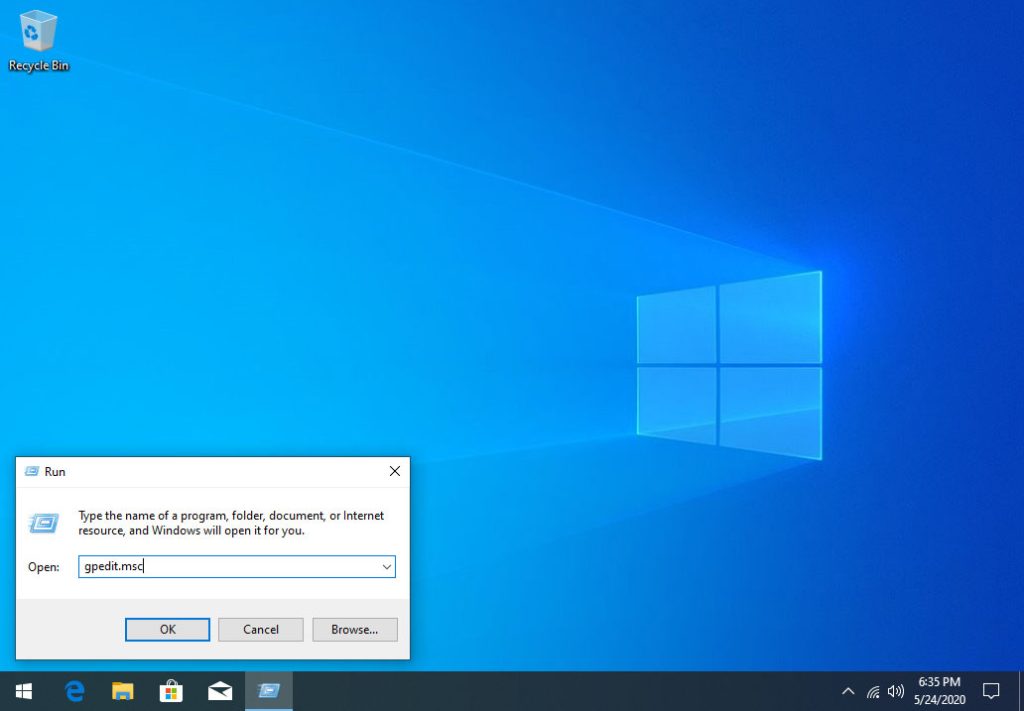
1. Open Run by pressing Win + R Keys
2. In the Run box you have to type the gpedit.msc and then click on Ok option.
3. Now Local Group Policy Editor windows open.
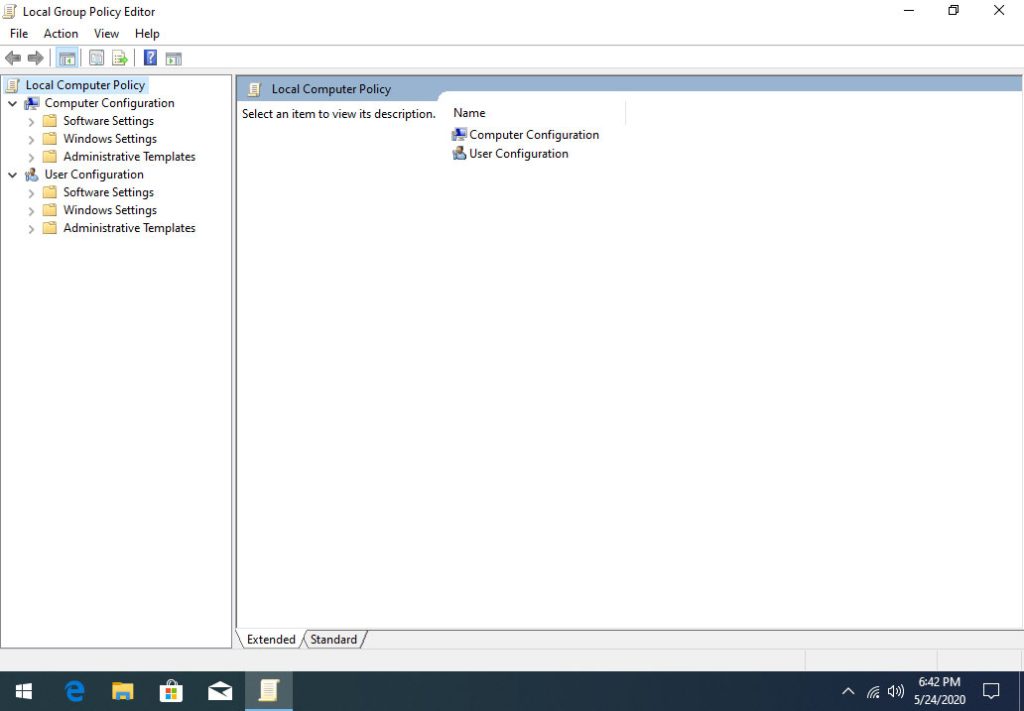
4. Now you have to go to the under Local Computer Policy, following location:
Computer Configuration\Administrative Templates\Windows Components\Windows Update
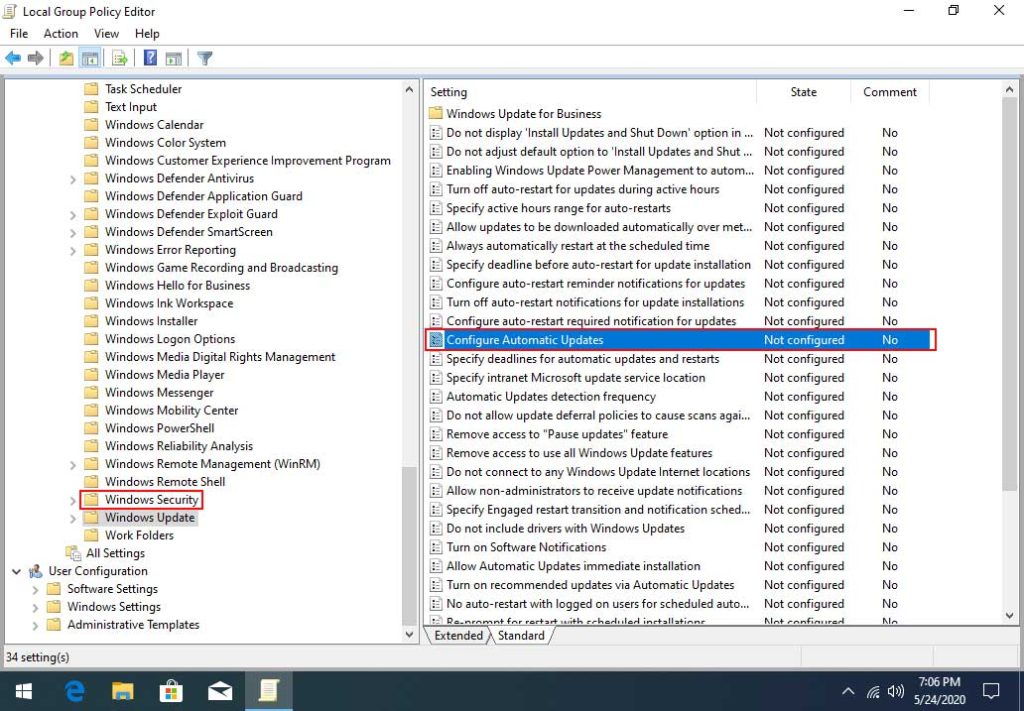
5. Right-click on Configure Automatic Updates and then click on Edit option or you can Double-click on Configure Automatic Updates option on the right side.
6. Check the Disabled option to turn off the Automatic Updates.
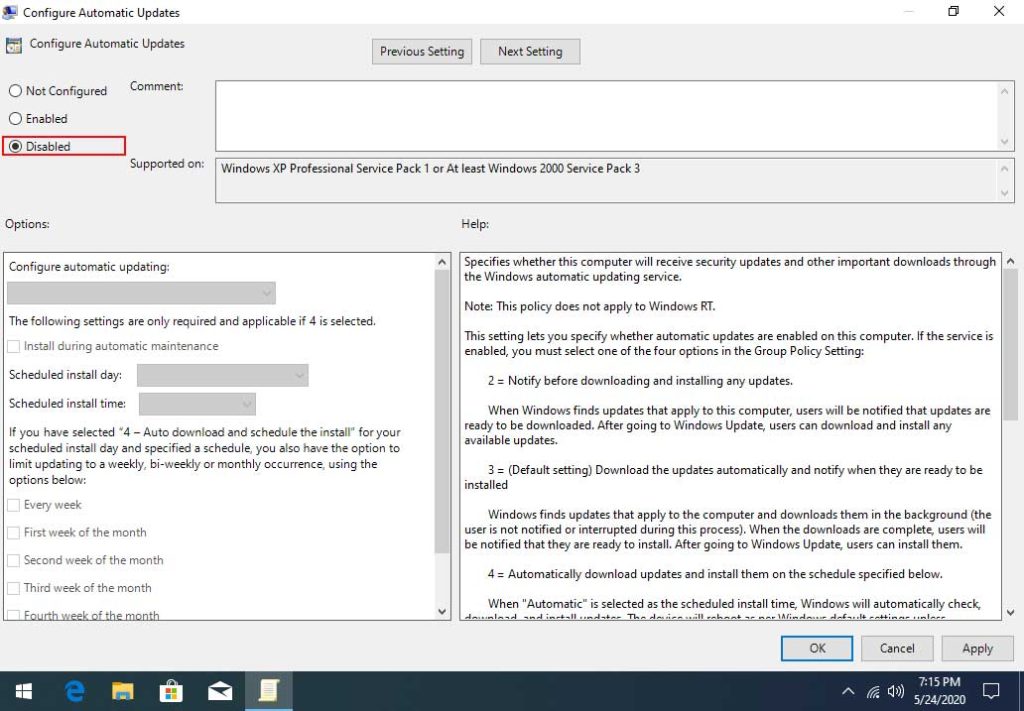
7. Click on Apply and then click on the OK button.
Once you will follow the above steps, your Windows 10 will stop the automatic updates. And if you go to the Updates & Security, you will get a notification there, *Some settings are managed by your organization. and you will also get a message there *Your organization has turned off automatic updates.

Now you have to manually from Settings > Update & Security > Windows Update, and clicking the Check for updates button to update your Windows 10, and if you want to enable automatic update so you have to get to Step 6 and select the Not Configured option your automatic update will be enabled.
Disable Windows Update Service
This step is also to disable the automatic Windows 10 update but only for some time because this service auto-enable after some time but for some time you can use this method. I recommended the first method to disable the Windows 10 updates.
Disabling the update services
If you want to disable the Windows 10 update temporarily or for some time you have to follow the following steps:
1. Open Run by pressing Win + R Keys
2. In the Run box you have to type the services.msc and then click on Ok option.
3. Now in Services(Local) right side scroll down and double click on Windows Update.
4. In Windows Update Properties you have to click on Stop and then in Startup section click on the drop-down menu and select the Disabled option.
5. Click on Apply and then click on the OK button.
Metered Your Network Connection
A metered connection is a connection in windows 10 which is limit your data use, yes if you are using cellular data or limited data pack so you have to turn it on this feature and save your data. By default metered connection is disabled we have to enable it and we can set in both network connection WiFi as well as Ethernet as a metered connection.
To set a Wi-Fi network connection as metered:
1. Press the Win + I Keys
2. Windows Settings > Network & Internet > Wi-Fi > Manage known networks.
3. Select the Wi-Fi network > Properties > turn on Set as metered connection.
To set an Ethernet network connection as metered:
1. Press the Win + I Keys
2. Windows Settings > Network & Internet > Ethernet
3. Select the Ethernet network > Ethernet > turn on Set as metered connection.
Conclusion
This is the way to disable the Windows 10 automatic update. But the first method is good to go I suggest always use the first method to turn off automatic updates in windows 10. This is to stop all updates and without your permission update will be stopped.
Important Things To Remember:
The author of this article does not promote any illegal activities It is just for education purpose All the activities provided in this article, YouTube channel, and on the website techdhee.org are only for educational purposes. If you are using and follow this tutorial for any illegal purpose, techdhee.org can not be responsible for your action. My purpose is to educate or share the information who have not, how to secure your self from the Internet, and the world of digital. Also, read the Disclaimer
Finally
Thank you for reading this post and keep connected to TECH DHEE to continue enjoying excellent posts. Share your views about this post in the comment section below. If you still have any queries, throw it in the comment section. If you find this post helpful, don’t hesitate to share this post on your social network. It will only take a moment, and also it is quite easy and useful for others.
Related Post