In this article, I am gonna show you how to create a system restore point in Windows 11 step by step. If you want to create a System Restore Point in Windows 7 /8 /8.1 /10/11 this is a way to protect yourself from system crashes. System Restore Points is most important when your computer goes down with some reason that time system restore points like an insurance policy. When you create the System restore point it creates a restore point and all the settings will be saved at the point anything causes the system to crash and burn, simply run a System Restore and take everything back to the way it was before the crash. It is a very important thing f you want to do something with your computer like install any third-party software and you do not know about the software so that time you have to create a restore point if software creates any problem so you can just get your system back without any problem.
How to Create a System Restore Point in Windows
Open Run Box
We haveto open RUN pressing Windows + R button.

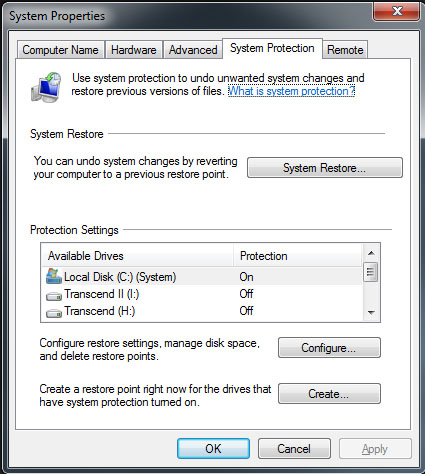
Open System Properties
Type Here sysdm.cpl and press Enter or Click on OK Now Click on System Protection

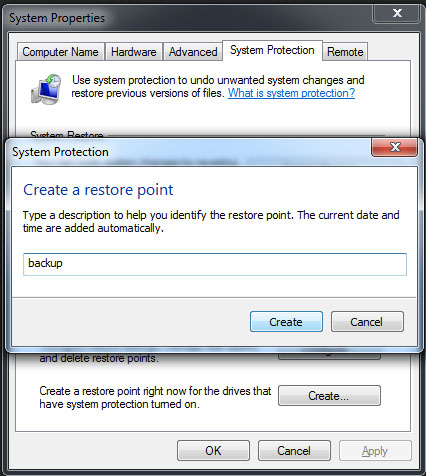
Create a restore point
Now Click on Create and Enter the name of Restore Point

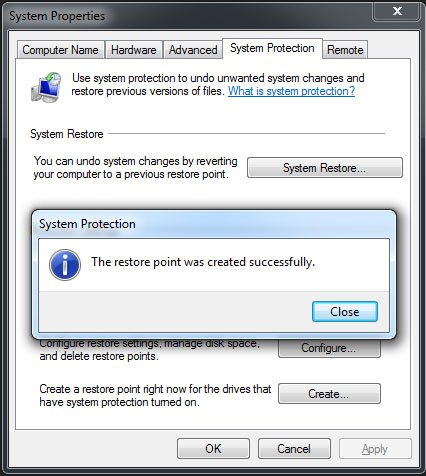
Restore point created
Now final step Click on Close and Then OK

Video
Here you can watch this video and follow the steps to create a restore point in Windows
Finally
Thank you for reading this post and keep connected to TECH DHEE to continue enjoying excellent posts. Share your views about this post in the comment section below. If you still have any queries, throw it in the comment section. If you find this post helpful, don’t hesitate to share this post on your social network. It will only take a moment and also it is quite easy and useful for others.
Related Post


